5 January 2026
How to reseal a bath, hassle-free
There are plenty of reasons you might want to reseal your bath. Sometimes, it’s simply because your bathroom looks a bit tired, and some fresh sealant could help freshen it up.
Perhaps the sealant has even started to crack or peel, and there’s mould creeping along the edges. If that’s the case, damaged or worn sealant might even be starting to let water through, causing a leak...and you’re going to want to fix that quickly, before it becomes a problem!
Whatever the reason, resealing your bath is a simple way to protect against water damage—all while making sure your bathroom looks its best. In this guide, we’ll cover the tools you’ll need, step-by-step instructions, and when it’s worth calling in a pro.
What do I need to reseal a bath?
Before you start, gather everything you’ll need. Having the right tools makes the job quicker, cleaner, and a lot less stressful. You’ll need:
Silicone sealant (choose a bathroom-specific, mould-resistant type)
Sealant applicator
Safety gloves
Masking tape
Caulking gun
Safety knife
Bathroom cleaning spray
How to reseal a bath in six simple steps
Resealing your bath properly isn’t just about keeping things looking neat, it’s vital for preventing leaks and long-term water damage.
If your bath sealant isn’t applied correctly, this can lead to water seeping behind tiles or under flooring, causing mould, rot, and potentially costly repairs.
If you feel comfortable and confident doing it yourself, follow our simple step-by-step guide below to reseal your bath safely and effectively.
However, if you’d rather leave it to the pros, book a bath sealant job with Ding. One of our friendly experts can pop by to get your bath resealed quickly and hassle-free.
1. Remove the old sealant
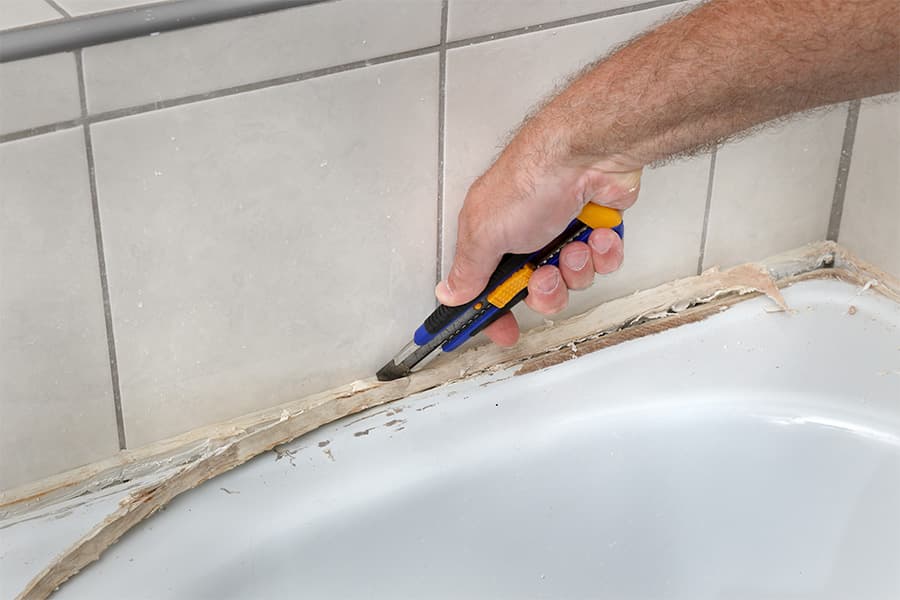
Start by putting on your safety gloves and carefully removing the old sealant with a safety knife or a sealant remover.
It’s important to take your time with this because precision will help to avoid scratching or chipping the bath’s edge. Work slowly and keep your hand steady, especially around corners and tight spots.
Tips from our experts: Sealant is supposed to be stubborn so removing it can be quite difficult. If it feels too hard or puts strain on your back and knees, then remember to take breaks. Or just get one of our plumbers in to finish the job.
2. Clean the surface
Once the old sealant is gone, it’s time to clean up. If there’s no mould, a standard bathroom cleaner or a mix of white vinegar and warm water will do the trick. If you do spot mould, use a mould remover to get rid of it.
Once the area is clean, make sure the surface is completely dry before you move on, as any moisture can stop the new sealant from sticking properly.
3. Prepare the bath
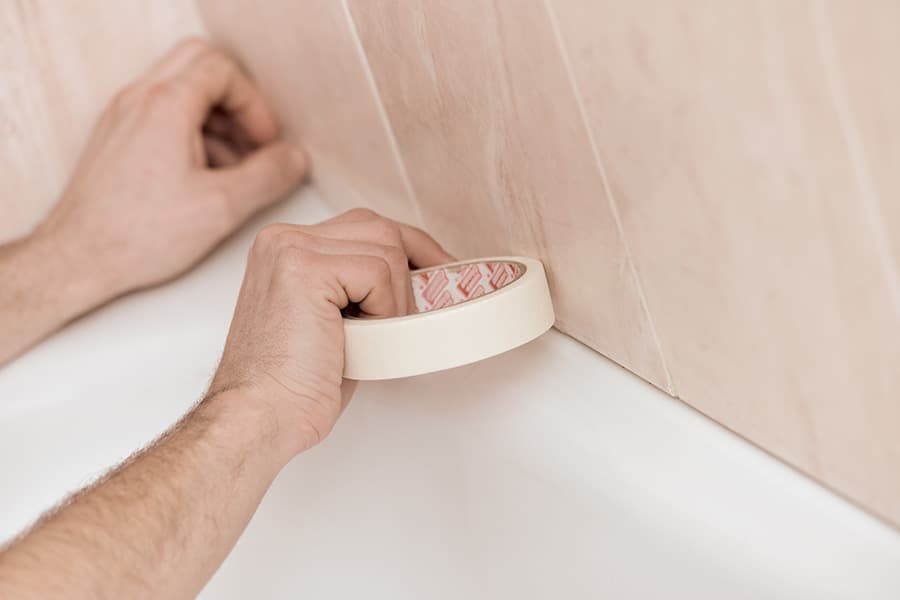
Next, use two lines of masking tape along all the edges of the bath, leaving a neat gap in the middle where the sealant will go.
Before applying any sealant, fill the bath halfway with water. This will help the bath settle into its usual position and prevent the seal from cracking or splitting later on when it’s being used.
4. Prepare and apply the sealant
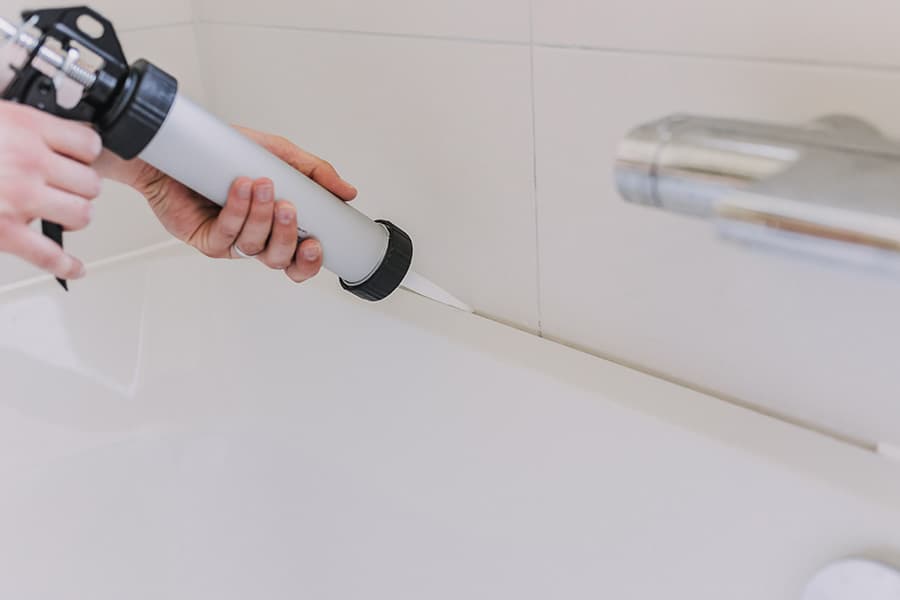
Load your silicone sealant into your caulking gun (if your sealant doesn’t come with an applicator) and cut the nozzle at a 45-degree angle. With a smooth hand, place the nozzle in the gap between the masking tape and apply a steady, even bead of sealant all the way around.
Make sure to start from one side and work your way around, applying the sealant in a smooth consistent motion.
5. Smooth and shape the sealant
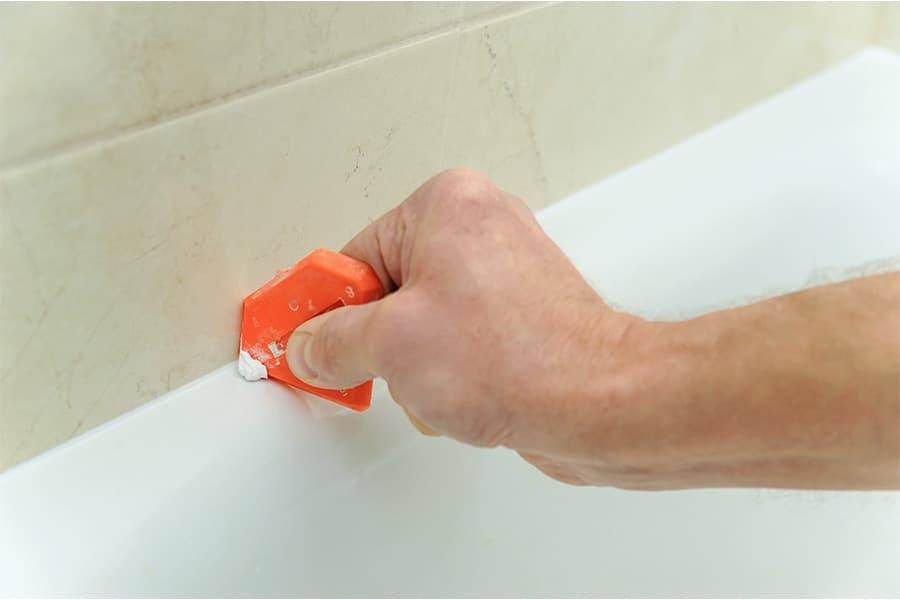
Once applied, use your sealant applicator to smooth the bead at an angle that will help the water flow back into the bath rather than pool on the edges.
Remove the masking tape while the sealant is still wet for clean, sharp lines, then leave it to cure as per the sealant instructions—usually 24-48 hours.
6. Test the new sealant
When the bath sealant is fully cured, pour a little water around the edges to make sure there are no gaps or leaks. If it’s watertight, you’re good to go—and your bath should look as good as new!
If you’re having problems or just need a bit of help, book a bath sealant job with Ding and one of our friendly experts will sort it quickly and professionally.
Common questions about resealing baths
How long does bath sealant take to dry?
Most bathroom sealants take around 24-48 hours to fully cure, but always check the instructions on the tube for the best results.
How do you remove bath sealant?
Use a safety knife or a special sealant remover to carefully cut and lift away the old sealant. Take your time to avoid damaging the bath or tiles.
How often should you reseal a bath?
Typically every 1-3 years, or sooner if you notice cracking, mould, or peeling.
Can you put new bath sealant over old sealant?
You shouldn’t put new sealant over old sealant, as the new sealant won’t stick properly and may peel off. Always make sure to remove the old layer first for a clean, lasting finish.
How to stop bath sealant from going mouldy
Make sure your bathroom is well ventilated and wipe down the seal after each bath or shower. When resealing your bath, you can also use a mould-resistant sealant to help keep things fresh.
How long does it take to reseal a bath yourself?
For most people, it usually takes around 1–2 hours, plus drying time (24-48 hours).
Should I get a professional to reseal my bath?
If you’re not completely confident you can reseal your bath properly, it’s worth getting a professional in. Poorly applied sealant can lead to leaks, water damage, or mould growth down the line—and that can be a far more expensive fix.
Our expert Ding engineers can reseal your bath quickly and correctly, giving you peace of mind that everything’s watertight and ready to use.
Bathroom sealant looking tired? Just Ding it
If your bath sealant is cracked, mouldy, or coming away, Ding is here to help with resealing baths, plumbing repairs, and more.
If you’d rather skip the mess and get it done right the first time, just Ding it.
Written by:

Liam Sharkey
Service Excellence Coach
With 18 plus years of plumbing and drainage experience, Liam has got more than a few useful tips about how to tackle those common plumbing problems. He's completed jobs for homeowners and even massive events like the 2012 Olympics! Now, he works with our engineers in the field, giving them advice and support with those particularly tricky jobs.
Whatever your job—just Ding it.
Become a member today
For just £5/month and get direct access to trusted plumbers, electricians, and gas engineers—ready to tackle your immediate and future repairs.
Need something else?

Plumbing guides
Didn't find what you were looking for? We've got more plumbing guides straight from our experts.

Plumbing repairs
Don't fancy tackling this job yourself? Check out our plumbing repairs and prices.